The Gutenberg Editor has replaced the old classic WordPress editor and it is active on the default WordPress editor.
If you have written articles on sites like Medium.com, you might have come across a similar kind of experience as the Gutenberg. However, the Gutenberg editor is a lot more comprehensive and comes with different blocks.
Currently, Gutenberg is just the editor that you can use to create your blog posts. However, it will be extended to be the complete solution to create your entire site making it a lot easier for the newbie WordPress users.
As the new editor depends mostly on it’s blocks, the independent WordPress theme and plugin developers can easily create their own blocks to extend the overall experience.
In this article, we will look at the new Gutenberg editor in detail and learn along the way to use it the most proficient way.
Article Index
- Introduction to Gutenberg Editor
- Getting Started With Gutenberg
- Look & Feel of The Editor
- The Gutenberg Blocks
- How to Use Gutenberg Editor
- Compatibility Issues
- Pros & Cons of Gutenberg
- Final Word
Everything You Need to Know About The Gutenberg Editor
Introduction to Gutenberg
What is Gutenberg Editor
Gutenberg is the name given to the new to be WordPress editor that will be using to create your blog posts soon.
Gutenberg editor is Named after Johannes Gutenberg who invented the printing press 500 years ago.
The classic WordPress editor that you are using currently is simple with the title and the description box and the tools attached to it that you use to add different elements into your posts.
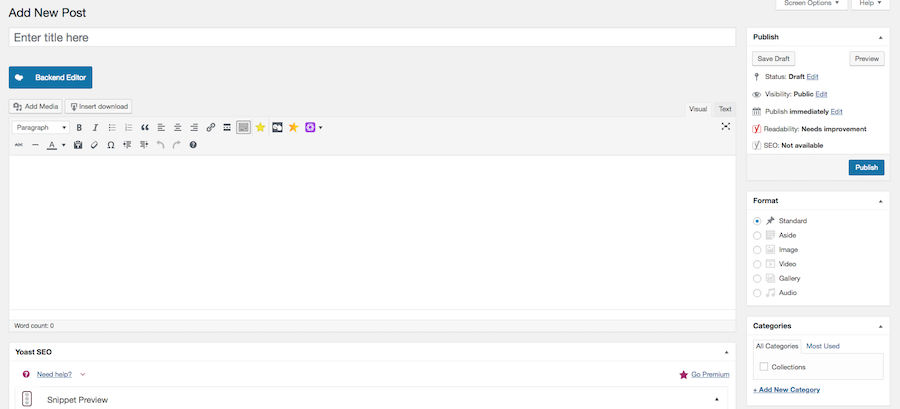
With the introduction of Gutenberg editor this system will completely change.
Now you will have to insert different blocks to create your blog posts. You have a number of different blocks created with the Gutenberg editor that we will see later in the post.
The new editor is expected to be a part
As already mentioned, you can use it by installing the plugin at the moment.
Over 600k users are already using the Gutenberg editor for testing or on active sites.
Hands On With Gutenberg
Getting Started With Gutenberg
As Gutenberg is going to be a part of WordPress software. It is better to start it with sooner so that you are used to the editor before it becomes mandatory.
We have been using the Gutenberg editor On BeginDot for a last few days. It surely has a number of benefits at the same time it needs a lot of improvements which is expected as it is work in progress at the moment.
To get started with the editor, go to the WordPress dashboard >> plugins >> Add new
You will see the Gutenberg plugin option right there. Just install and activate the plugin.
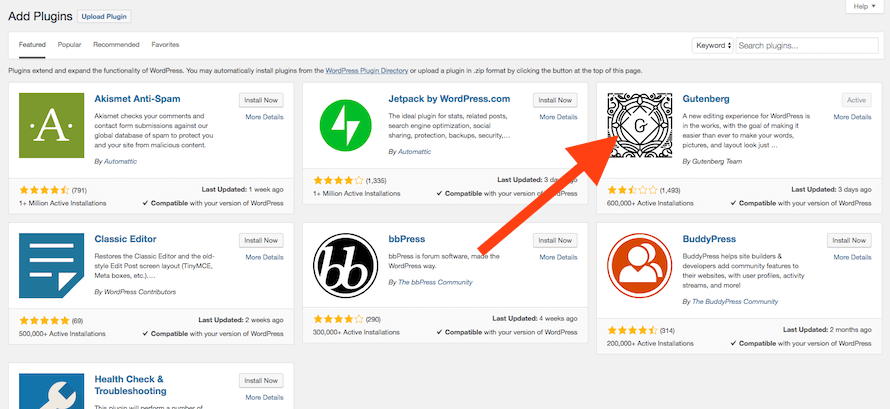
Before you start writing new content using the Gutenberg editor on your site, you have the option to test drive the editor right on your dashboard.
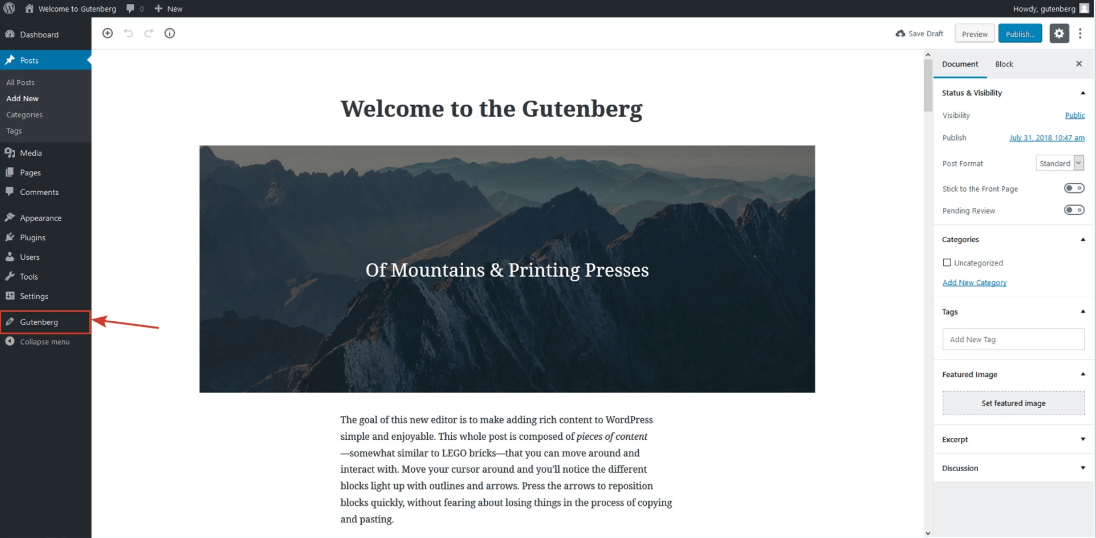
After activating the plugin, you will see the Gutenberg option on your WordPress dashboard.
Look & Feel of The Editor
Here is how the Gutenberg editor looks when you start creating your blog post.
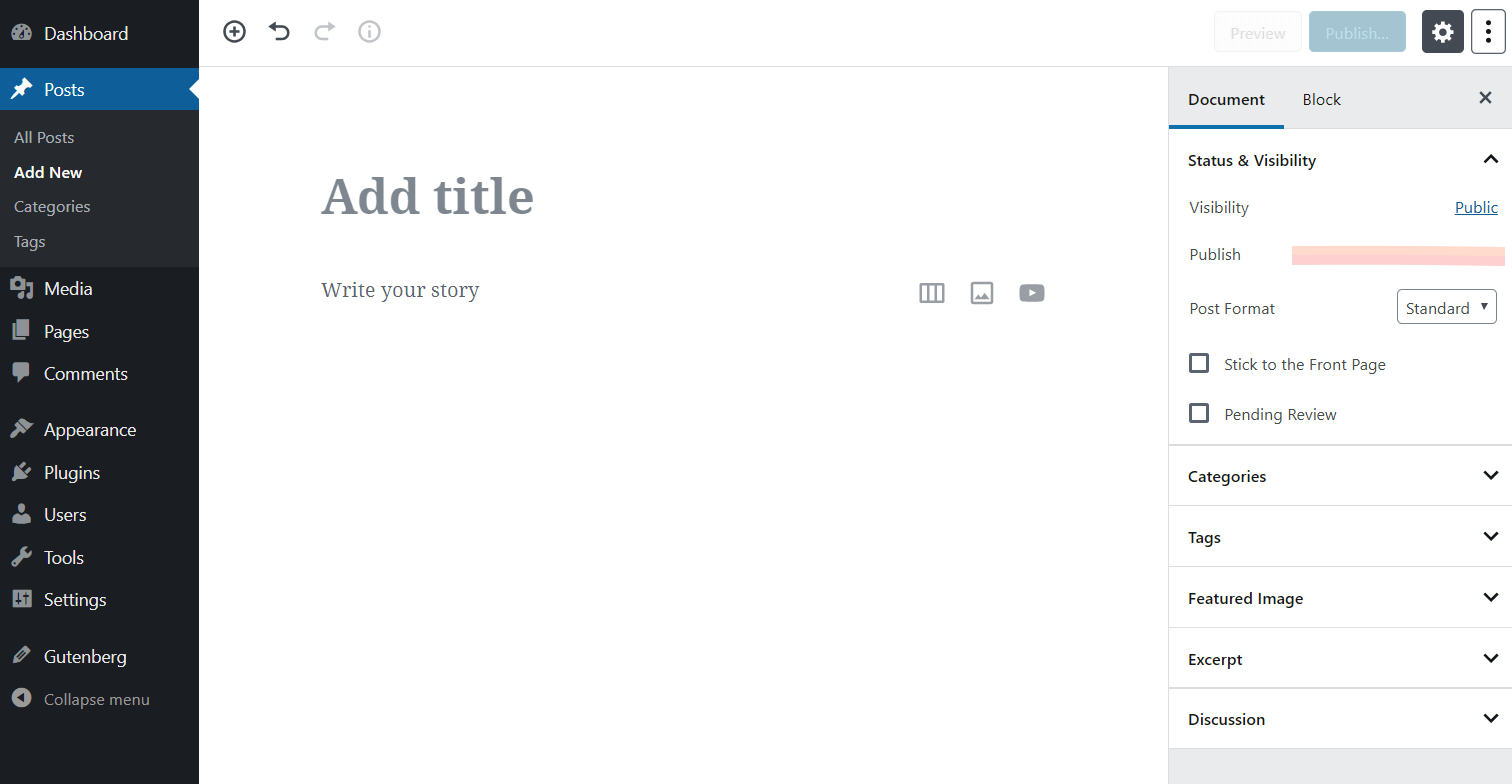
The interface is clean and distraction free. You can now start adding the blocks that you need on your post.
Now, as you see in the image above you have the option to add the title of your post and then the blank canvas for you to add any block that you wish to add.
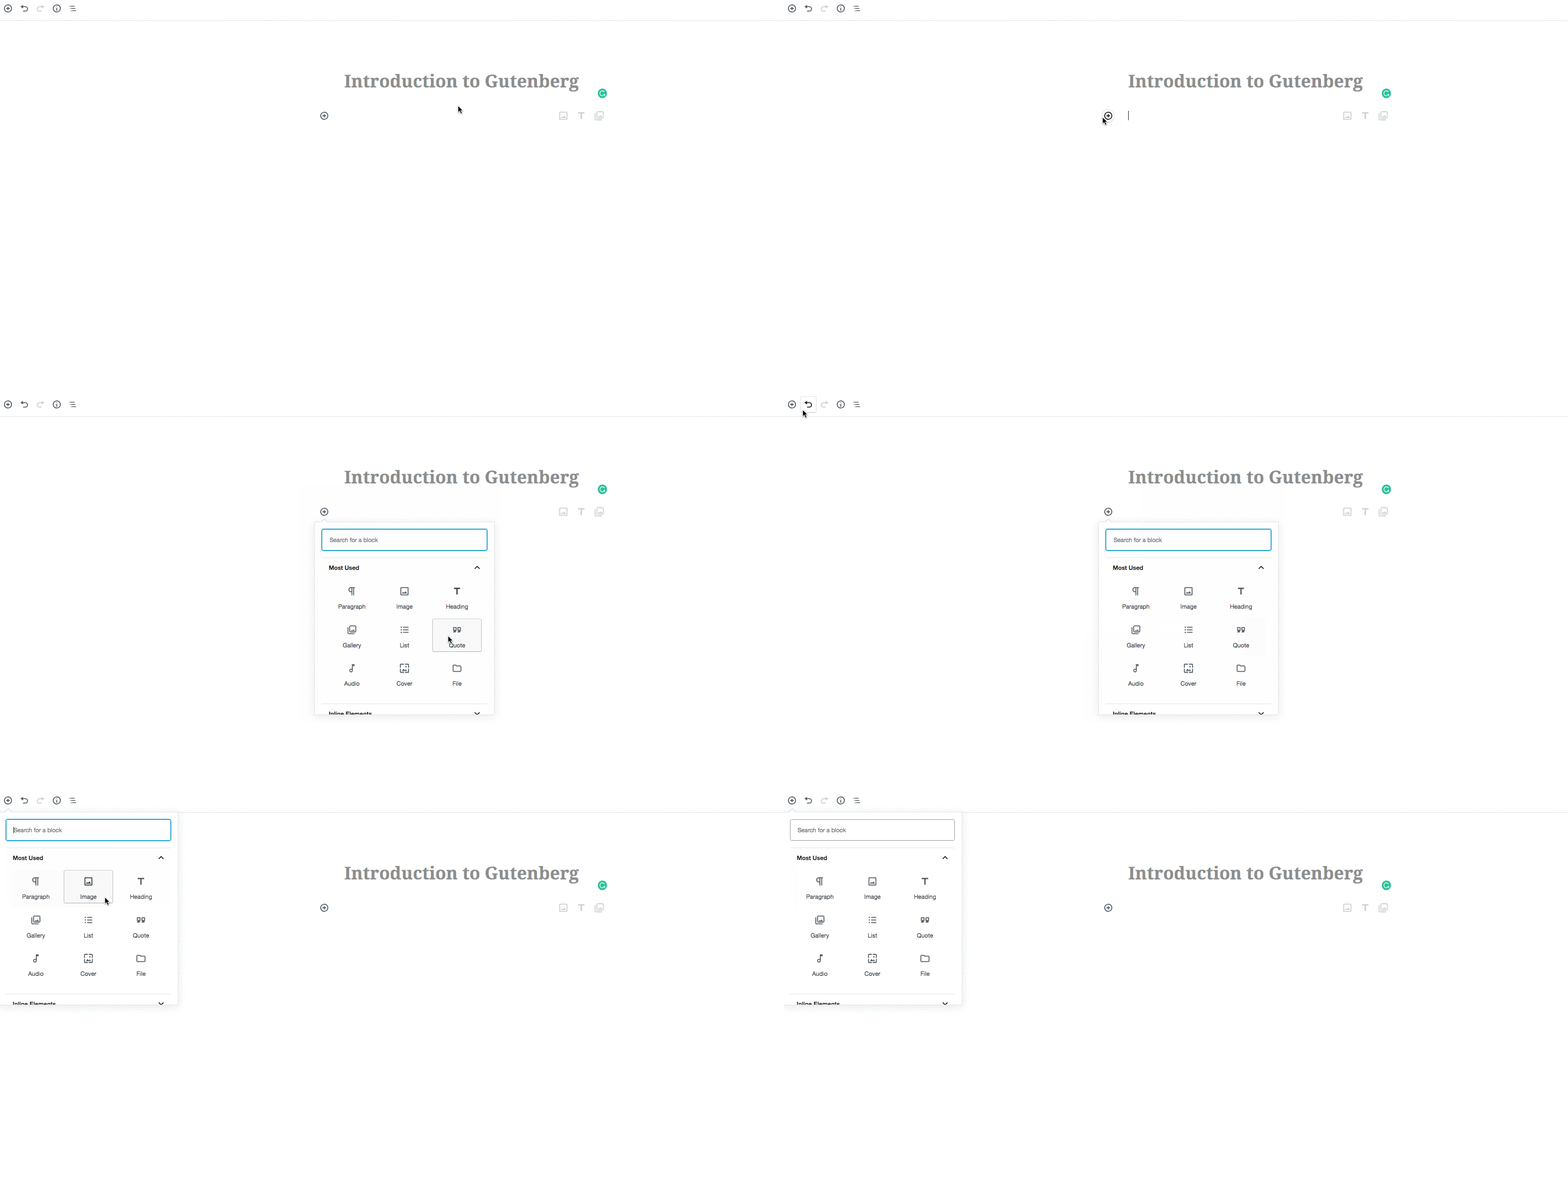
After adding the title of your post, come to the content area to add a block. You see the +Plus sign that you can use to add a block to your page.
You also have the option to add the block in the top left corner of the page.
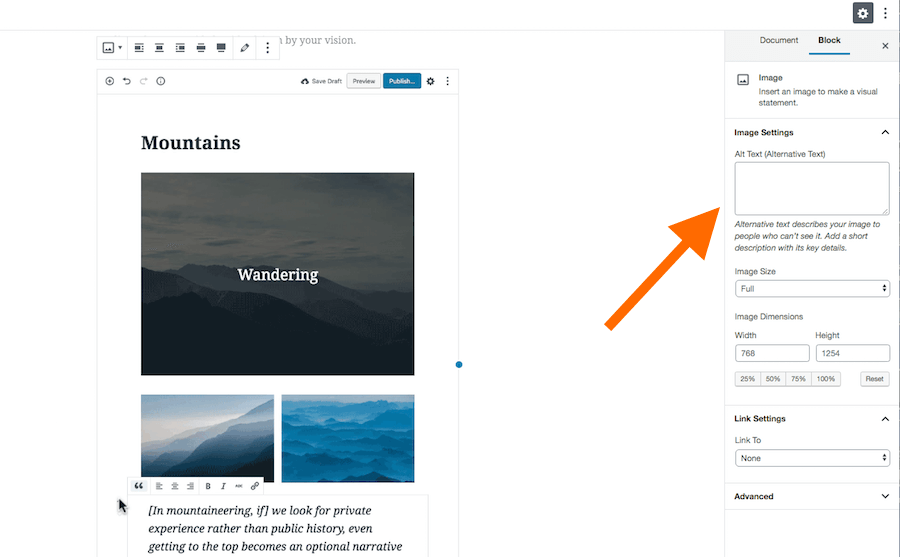
Right Bar
The details in
As you start editing a text block it will change accordingly.
Visual Editor & Code Editor
Like you had the option in the classic editor to move around visual and the code editor. The Gutenberg editor also gives you the option to use the code editor in case you need that.
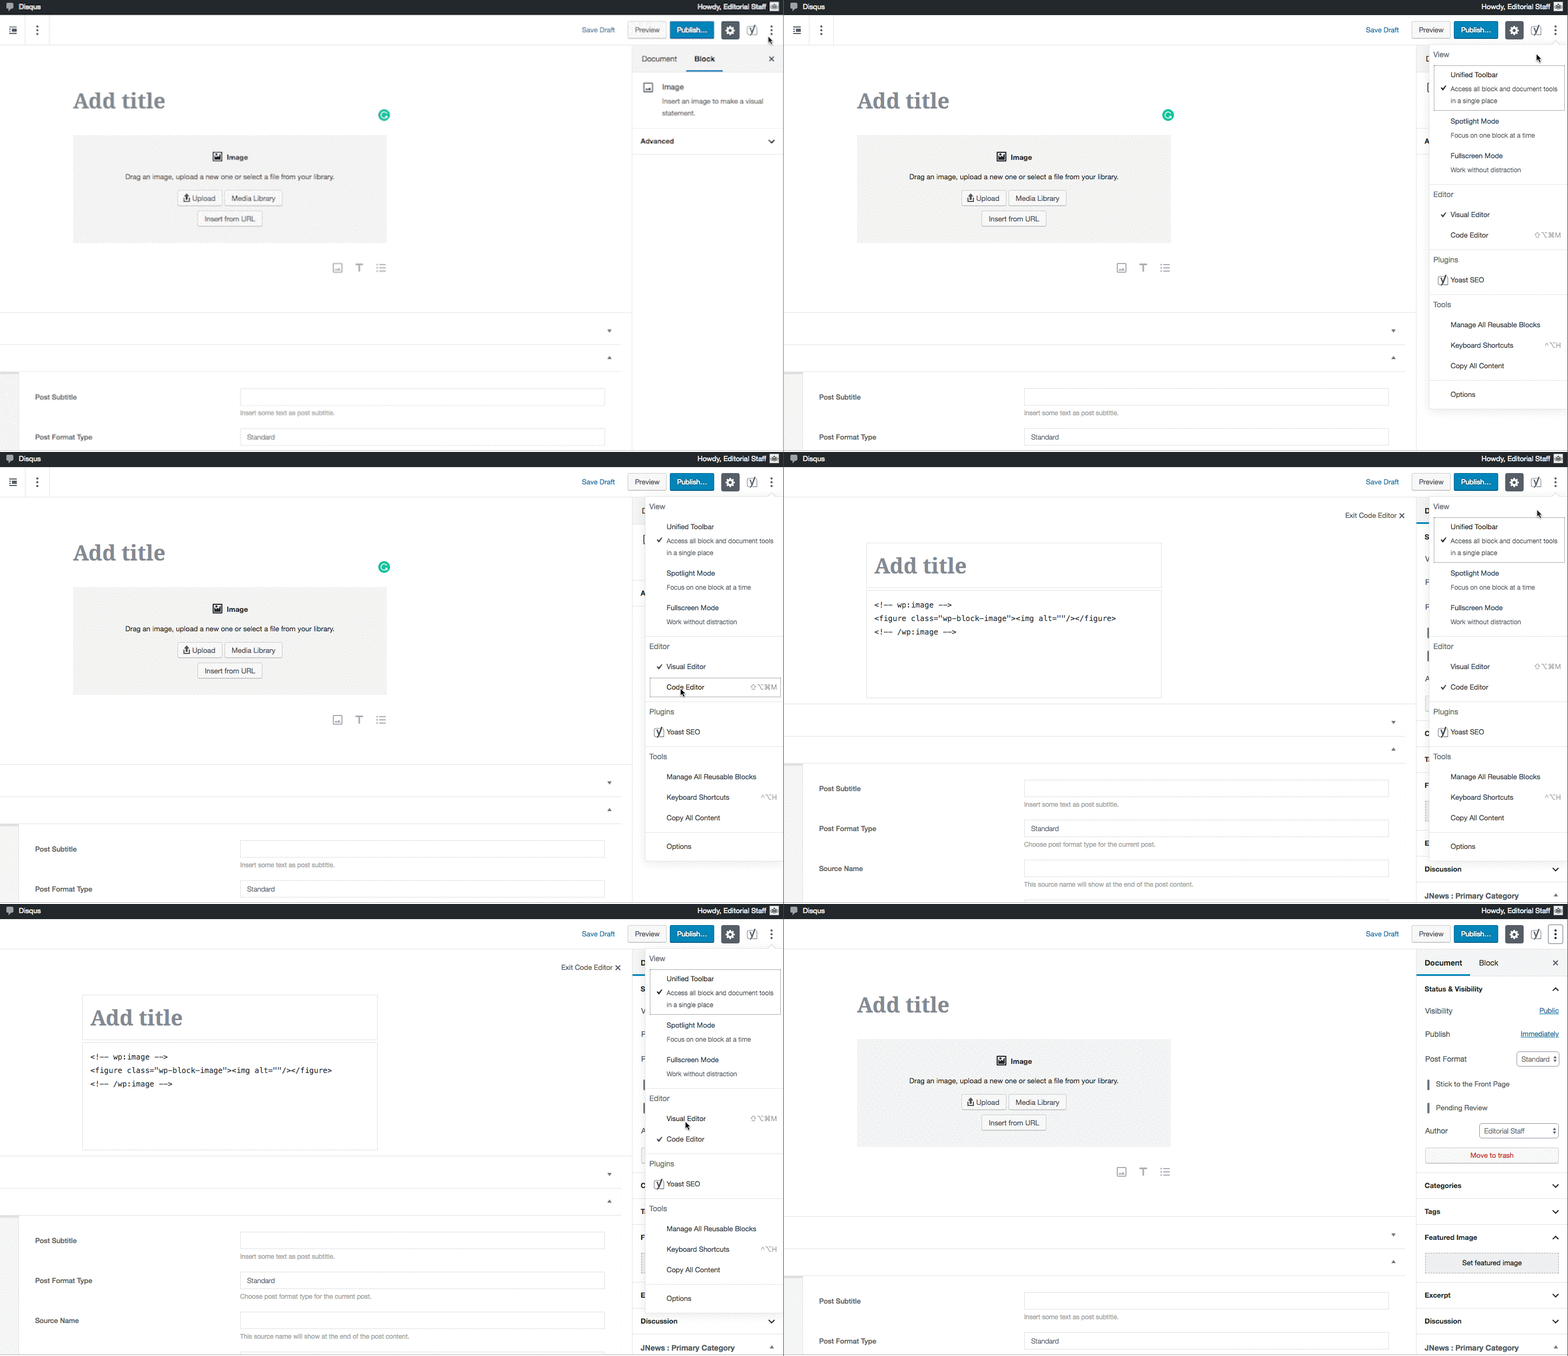
Featured Image for The Post
Like in the old editor, you have the option to select the category of your blog post, option to add tags and featured image in the right bar under the documents tab.

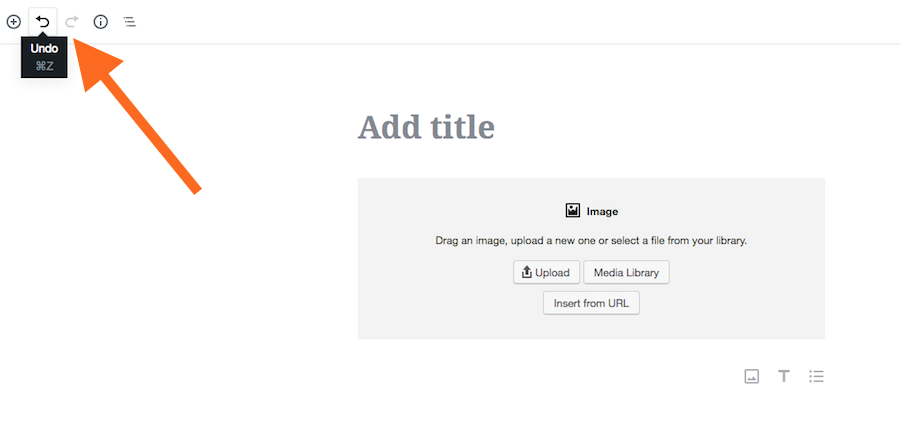
Redo & Undo Option
Here is a nice option to move back and forth your article. The Gutenberg editor offers you simple redo and
You can use these two icons to undo and redo your last action.
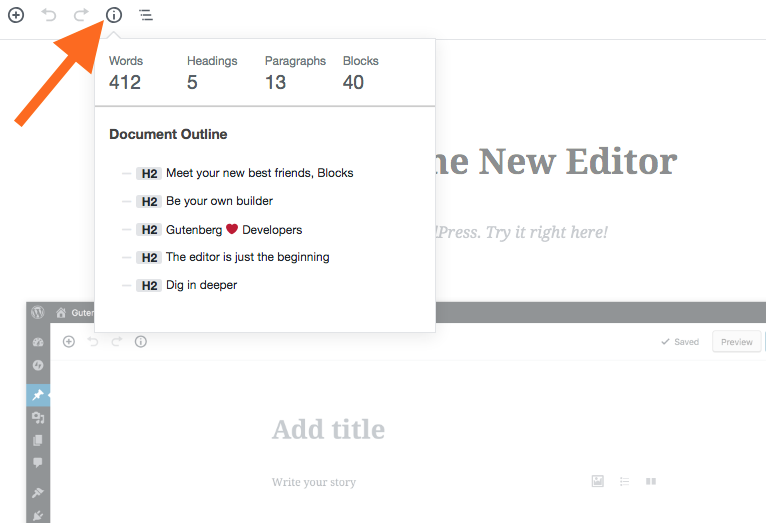
Quick Stats
This is a very useful feature offered in the Gutenberg editor. While writing your content, you can just click and check the number of words on the page, the number of blocks that you have used, the number of headers, paragaphs etc.
Introduction to The Blocks
The Gutenberg Blocks
The Gutenberg editor is all about the blocks. So, these are links
When you are creating your blog posts, after adding
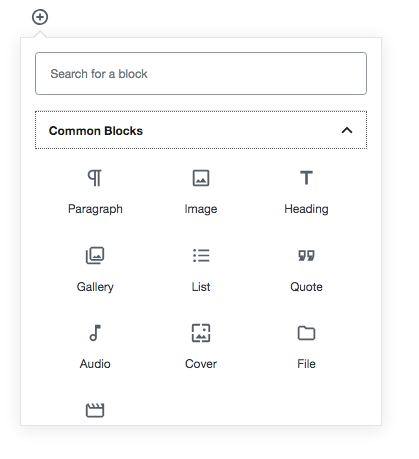
You will see a number of different groups created for the blocks such as the most frequently used blocks, common blocks, inline elements, formatting, layout elements, widgets etc.
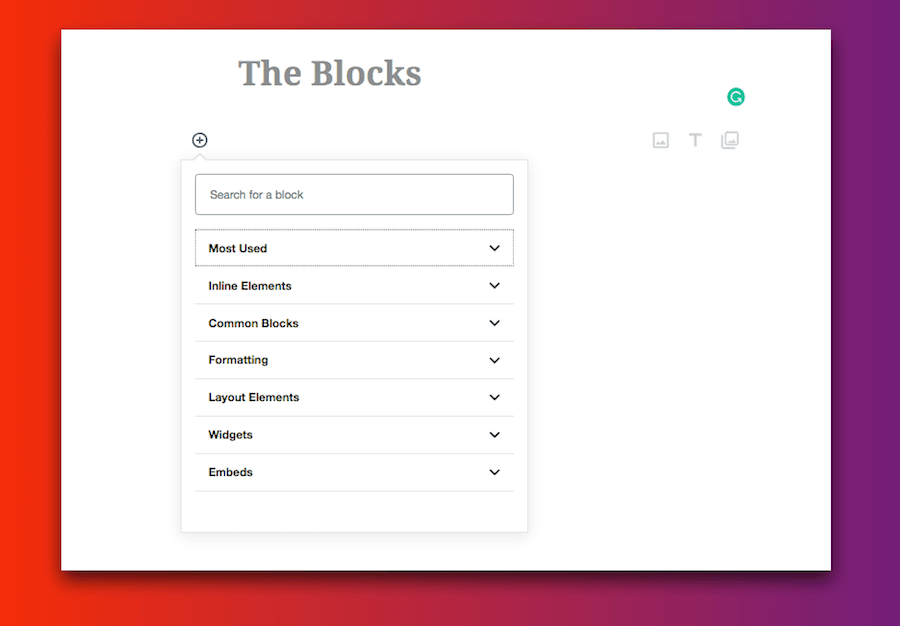
Let’s have a look at each of the groups one by one.
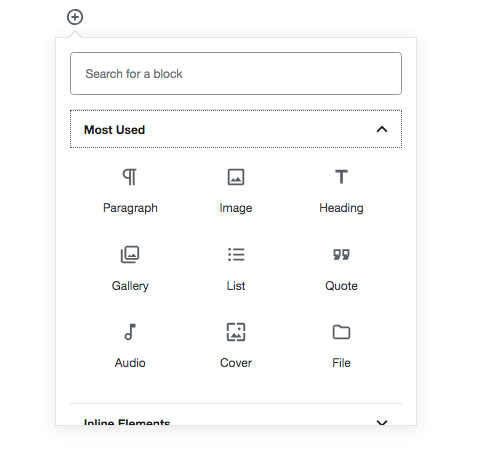
The Most used blocks will obviously the ones that are used most frequently while creating a blog post such as the heading, image, paragraph etc.
The common blocks will also have somewhat the similar blocks in it.
If the default Gutenberg blocks are not enough for your site, there are a number of new Gutenberg block plugins that you can use on your site.
Formatting Blocks
There are a few useful blocks under the
- Classic Editor: If you need to old classic editor toolbar to edit anything, you will find it here
- Custom HTML: The option to add custom HTML
- Add Code: Add code on your tutorial posts
- Add a Table: This is a very useful addition to the WordPress editor, now you will not need a plugin to add a table to
you posts.
Embeds
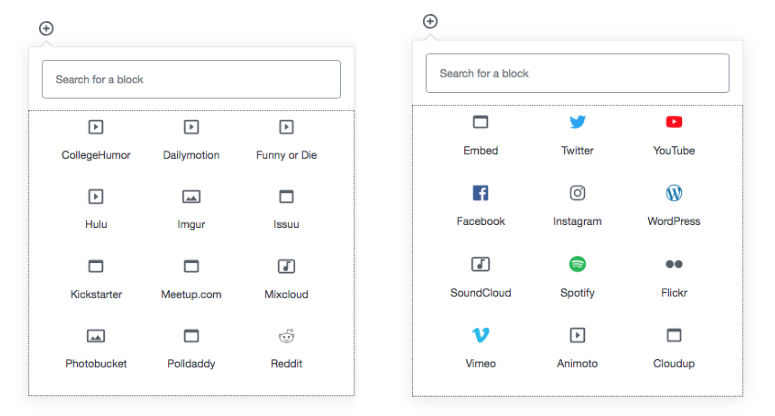
With the rise of multimedia content, viral content type, the importance of embed functionality has gone up.
Content producers are using content from Twitter, Instagram, YouTube very regularly these days.
The Gutenberg editor makes it super simple and easy for the users to embed content from a number of popular platforms with ease.
Layout Related Blocks
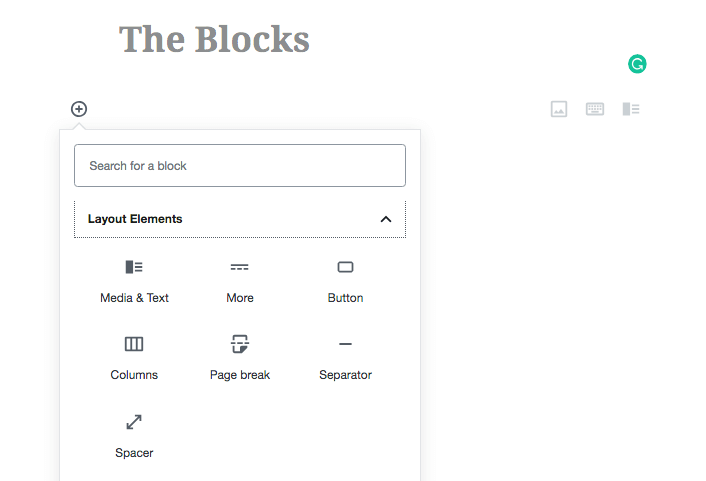
The layout blocks will be very useful for the users. Now, you don’t need to use a shortcode plugin to add buttons to your post anymore because you have the built-in option to add a button.
There are a number of useful layout design options to choose from.
How to Use Gutenberg Editor
Creating a Post Using The Gutenberg Editor
Now that you are aware of the Gutenberg interface, let’s create a blog post using the editor.
We will try to go through the most frequently used blocks and create content with them.
To create a blog post, go to the port new option just like old editor.
Step 1. Title & Paragraphs
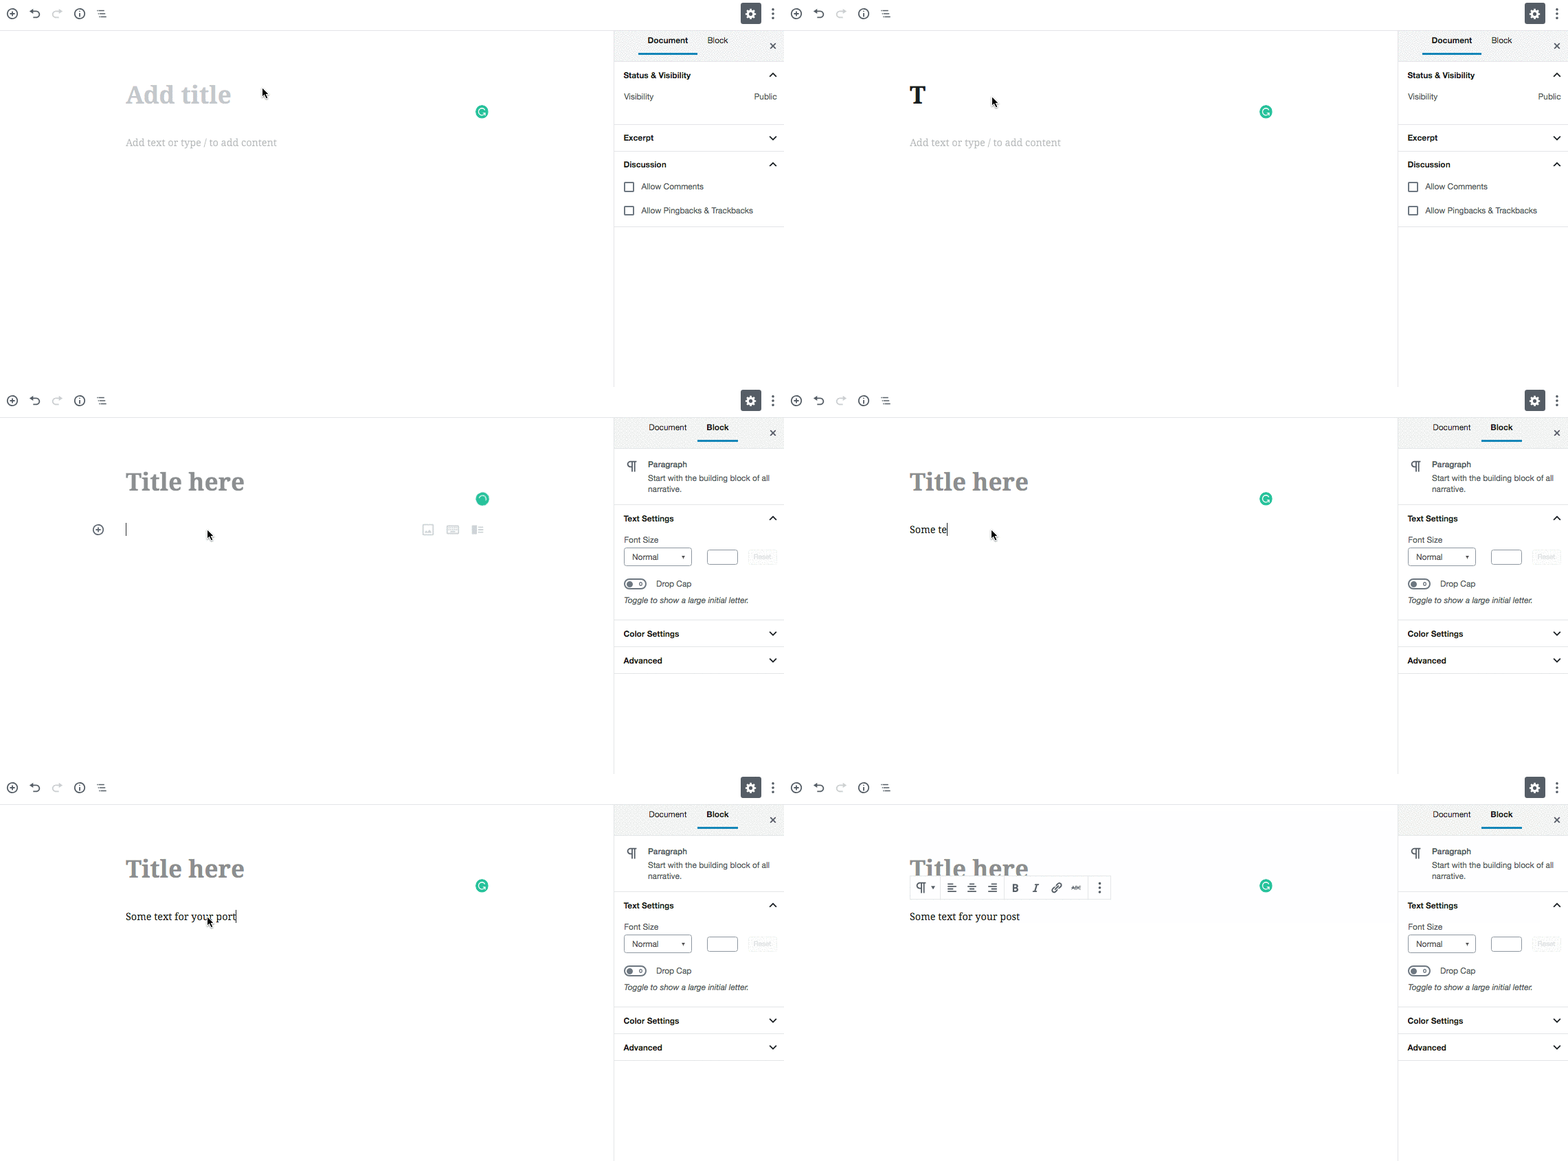
Add the title of your post and start writing your article. To add the content for the post, you don’t have to do anything, just click on the canvas and start writing.
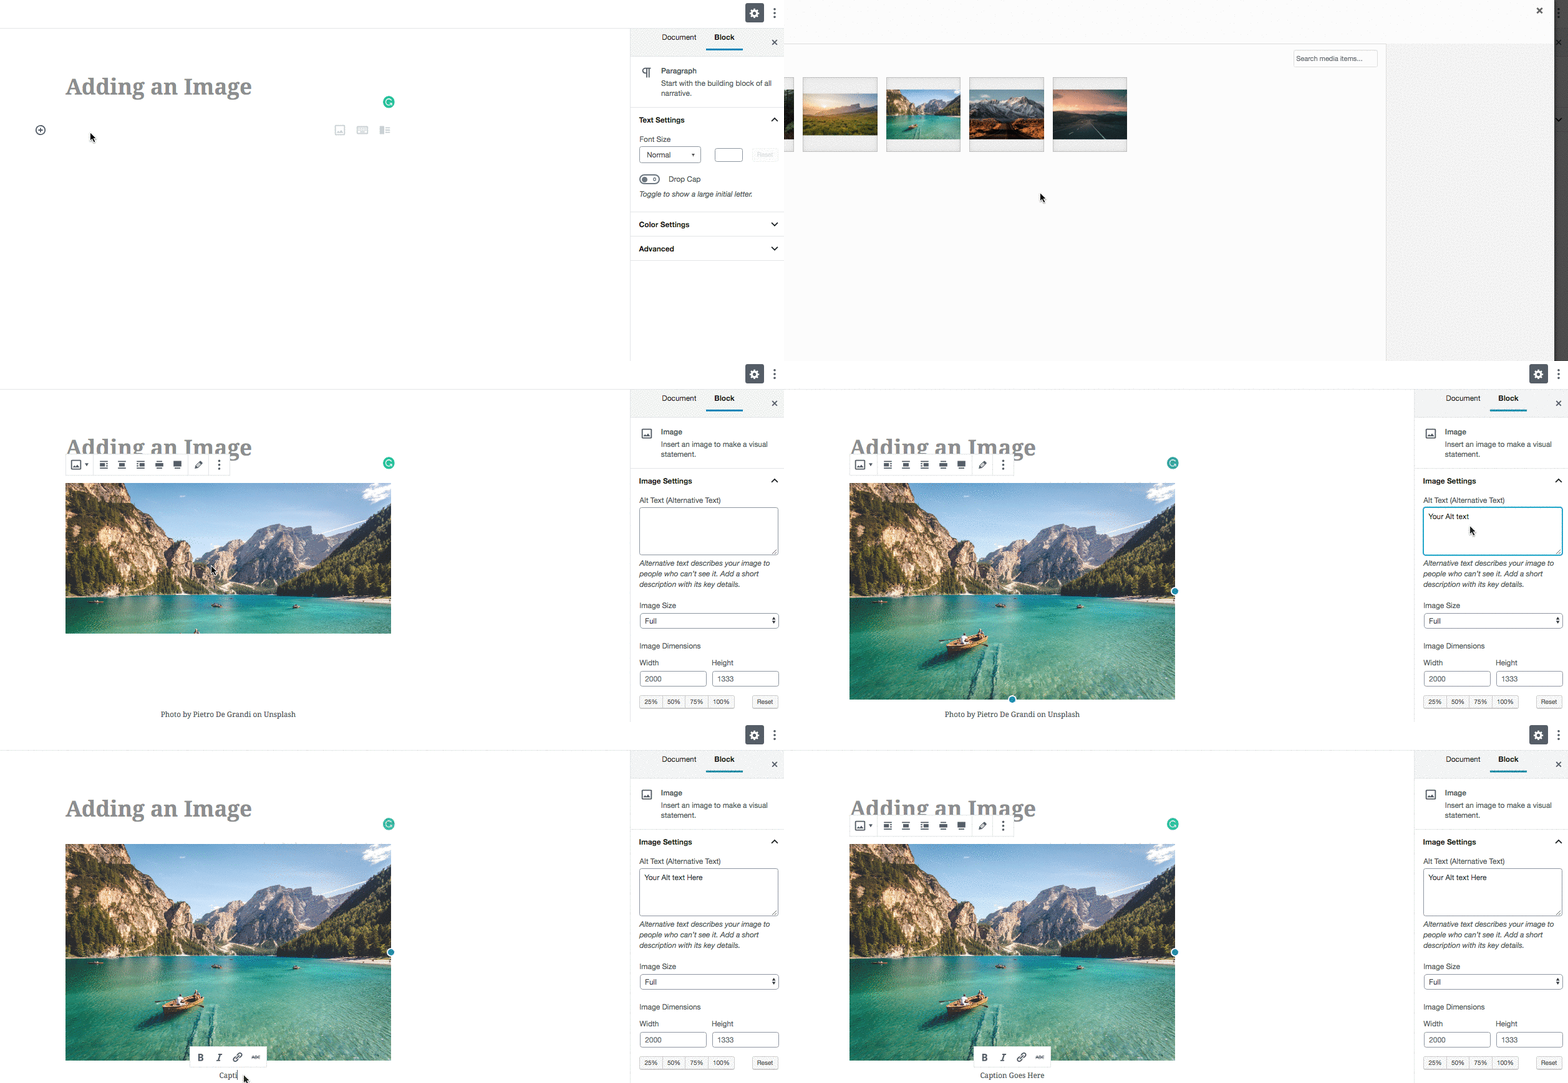
Step 2. Adding An Image
Other than the text of your blog post, the second most important thing on your blog post is the image or the images for your content.
You can click on the +plus sign and add an image block to add the image of your choice.
Now, there are a few different options for images in the Gutenberg editor that you can use according to your need.
- Simple image block
- Image and text block (found under layout blocks)
- Cover Image
As we are talking about the normal blog post images, let’s one for the post.
Step 3. Add a Video
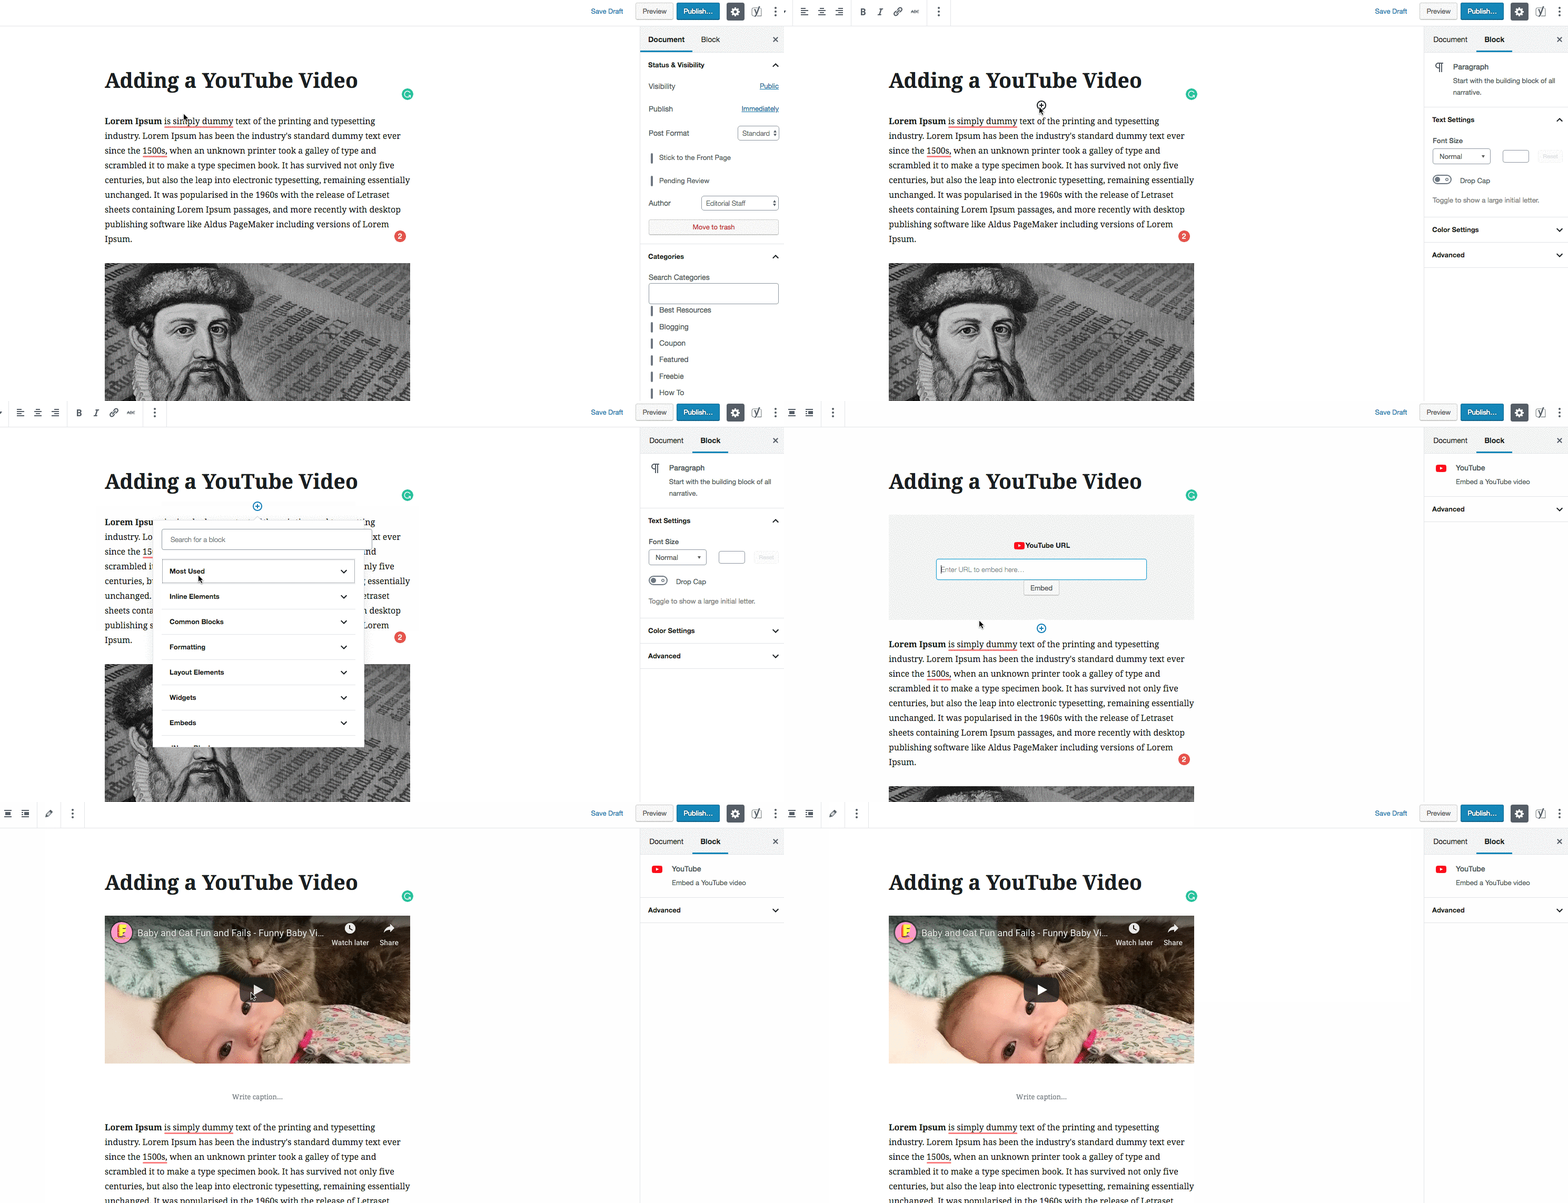
As already discussed in the Blocks section, the Gutenberg editor comes with a comprehensive list of embed options.
So, not only YouTube videos, you can embed content from a number of other services to make your blog post look stunning.
To add a video to your blog post
Click on the +plus icon and go to embed section. Select the YouTube option from the list, add the video URL and done.
Step 4. Adding a Call to Action Button
Once you start using the Gutenberg editor, you will not need a button shortcode plugin anymore.
The editor comes with

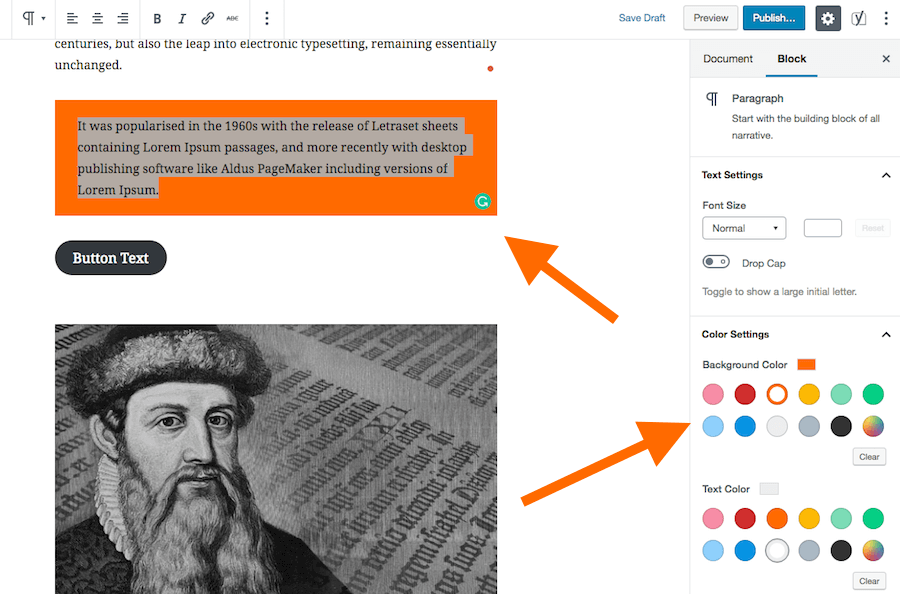
Step 5. Adding Background Color to Text
Gutenberg gives you the option to add a
The process is quite simple, you just have to select the text that you wish to highlight and the color options will come up in the right bar, select the background color, text color and done.
This is how you can highlight the text in your blog post to make it more interactive and engaging. It will also help you to attract the attention of your readers to the important sections on your blog post.
Compatibility Issues
Introduction of the Gutenberg editor is a big change and it will take some time to get everything else settle around it.
Many WordPress themes and plugins are not yet compatible with the editor.
For example, we were using a plugin to
Similarly, many shortcode
However, the compatibility issues are temporary, as the themes and plugins get updated as per the requirement of the Gutenberg editor, things should be fine.
We have created an article about the best Gutenberg ready WordPress themes, you can select any theme from that list.
Pros & Cons of Gutenberg
Gutenberg is great in many aspects and it needs improvement in many departments.
As we are already using Gutenberg on our site, we have the first-hand experience about the editor.
So, here is a list of things that we like about the editor and things that are creating issues for us.
Pros of Gutenberg
- The editor is quite simple and easy to use.
- It is comprehensive in terms of the available options
- No technical skills will be required to add a button or to highlight content
- A new user will be able to create a great looking article with nice presentation
- Modern layout options, not just simple one-column content anymore.
- The interface is clean and distraction free
- Works perfectly on the mobile devices
Cons of Gutenberg
- There is an option to open the link in a
new window but no option to addnofollow tag - Though there are discussions at many places, there is no dedicated support yet
- Plugin and theme compatibility can be a big concern
- Many important plugins are not functioning properly as of now
Final Word
Hope this article will help you to understand the Gutenberg editor better. As we are learning about the editor as you are, let’s have a discussion about the editor make this guide even more comprehensive.
So don’t forget to add a comment or concern in the comment box below.

