Ninja Table is a WordPress plugin designed to create dynamic tables on websites without requiring any coding knowledge. It enables users to display data in a sortable, filterable, and responsive table format.
Ninja Tables is a WordPress table builder plugin launched in 2017, designed to facilitate creating and managing tables on WordPress sites. It stands out for its capability to handle complex data presentations in a simplified manner, ensuring user-friendliness without requiring coding expertise. It is recognized as the ultimate data table plugin for WordPress. The plugin encompasses a broad spectrum of functionalities for customizing tables and charts, positioning itself as a comprehensive solution for interactive data representation within the WordPress platform.
What is Ninja Table Good for?
Ninja Table excels in providing an array of features that allow seamless creation, customization, and management of tables within WordPress websites, solidifying its reputation as Ninja Tables is the best table plugin available. It is particularly adept at transforming complex and extensive data sets into easily navigable and visually appealing tables. The plugin supports responsive design, ensuring tables look great on all devices, highlighting its effectiveness as a responsive table plugin. Moreover, it facilitates the integration of tables with other data sources and the customization of table design to align with website aesthetics, making it ideal for data representation and information organization.
Who Should Use Ninja Table?
Ninja Table is tailored for WordPress users ranging from bloggers, and small to medium business owners, to digital marketers and website designers looking for an effective way to manage and display data. It serves educational institutions, e-commerce sites, and any entity in need of presenting data in a structured and interactive format without delving into coding, asserting its dominance as the best WordPress table plugin for diverse applications. Given its user-friendly interface and comprehensive feature set, Ninja Table is well-suited for individuals and organizations aiming to enhance their website’s data presentation capabilities efficiently.
Ninja Table Company Details
Founded in 2017, Ninja Tables emerges as the prime WordPress table builder plugin developer, focusing on offering ease and versatility in data representation. The company, with a dedicated workforce of 11-50 employees, specializes in creating solutions that enable users to customize tables and charts seamlessly on WordPress platforms, eliminating the need for coding skills. Committing to revolutionizing the WordPress ecosystem, Ninja Tables strives to enhance user experience through its innovative and comprehensive features. With its foundation rooted in providing an ultimate solution for WordPress tables, the company demonstrates a strong commitment to innovation and user-friendly design in the digital space, positioning it as a leading table plugin in the industry.
Company Name: Ninja Tables
Est Year: 2017
Employees: 11-50
Ninja Table Demo & Media
Ninja Table Top Features
Offers Free Version
Easy to Use Drag and Drop Table Builder
Unlimited Table Styles
Advanced Customization
Unlimited Table Color Options
Media Upload Option in the Table
Export & Import Data
Mobile-friendly Responsive Tables
WooCommerce Integration
Create a Product Comparison Table
Pros of Ninja Table
Simple user interface
Free version available
Drag and drop table builder
Create eCommerce comparison table
Pre-designed table templates
Cons of Ninja Table
Free version is very limited
Ninja Table Pricing
Ninja Tables comes with a completely free version that you may start using. The pro version of the plugin comes with a number of useful features.
The pro version offers three plans to choose from and you have Annual and Lifetime billing option.
There are no reviews yet. Be the first one to write one.
Ninja Table Detail
Tables play a very important role if you want to show rich data on your website, blog articles as it offer a great experience to your users and make it easier for them to understand.
Generally, when we talk about the best content on the internet, high-quality blog posts; an article with research material and data-driven STATEMENTS will dominate the list.
So, how do you create a data table on your blog posts?
If you are using WordPress for your blog, a quality table WordPress plugin is the answer. A table plugin will make the process very simple and easy for you.
In this article, we will talk about a top-quality table plugin for WordPress, the Ninja Table plugin.
The plugin offers you a free version that you can download from the WordPress plugin directory and it also offers you a pro version that offers you amazing modern features to create a table on your site.
Here is a quick preview of the Ninja Tables.
Installation Process
If you are going for the free version of the plugin you can go to the admin dashboard of your site then to plugins >> add new and find Ninja Table to install it.
If you wish to go for the pro version of the plugin, you can get it here. Download the plugin and upload it to the add new plugin page.
After the installation, you will get the plugin option on the WordPress admin page of your site.
Creating a New Table
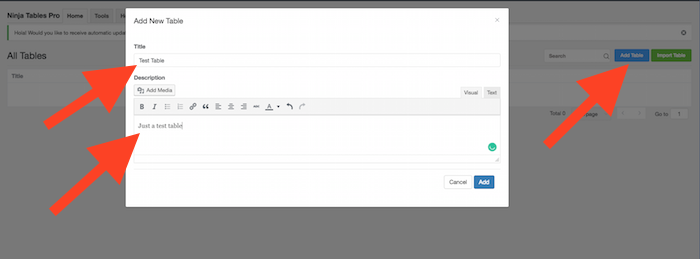
The process of creating a new table is quick and simple with the Ninja Table plugin. Just go to the Ninja Table setting and click on Add Table.
You will see the popup to fill the table details, put the table name and the description and move ahead.
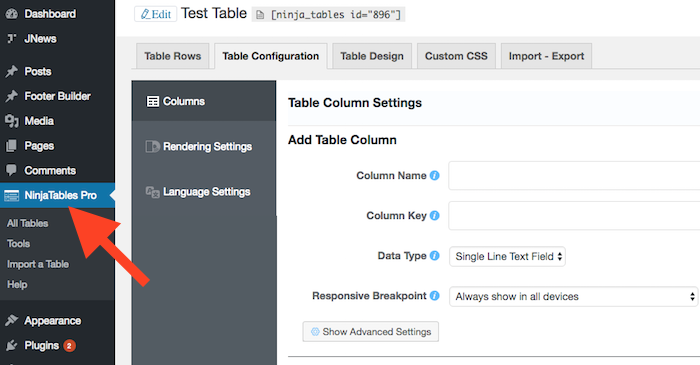
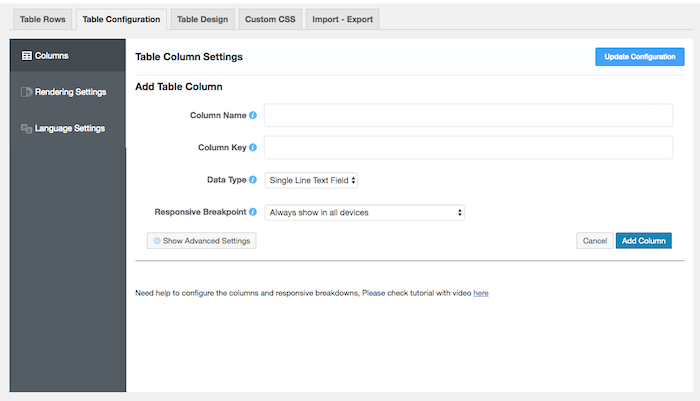
In the next screen, you will have the option to create your table and style it according to your needs. You have the option to set the column name, the column key will generate automatically as per the name, it will help you to map your data.
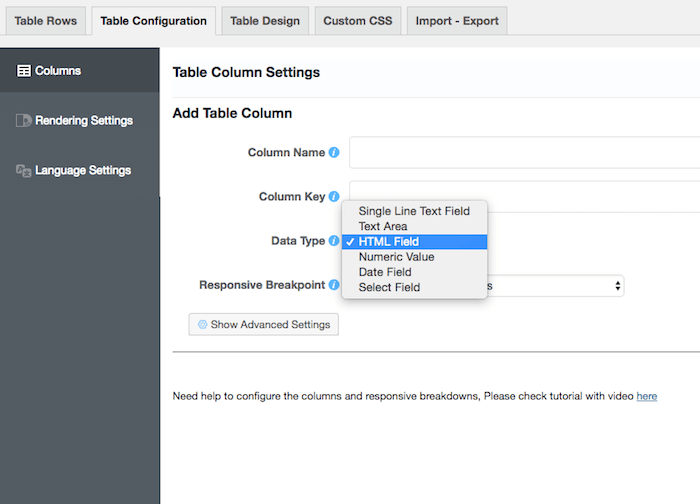
Here you have an option to select the data type in a particular column. You have a number of different options to choose from such as numeric value, HTML, text field, etc.
When you create a column, you will always have the option to go back and edit the name and other fields if there is any change.
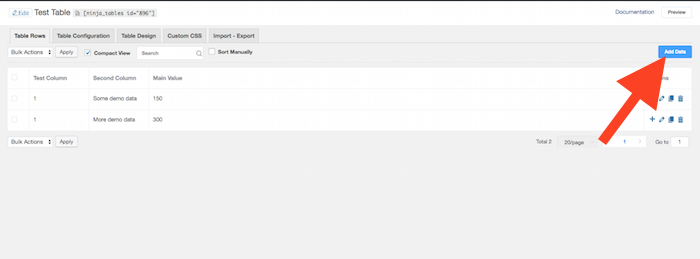
In the row section, you can add the values for the specific column you have created. You can click on add new row and fill in the data. Here also you can come back and edit the data anytime as per the changes.
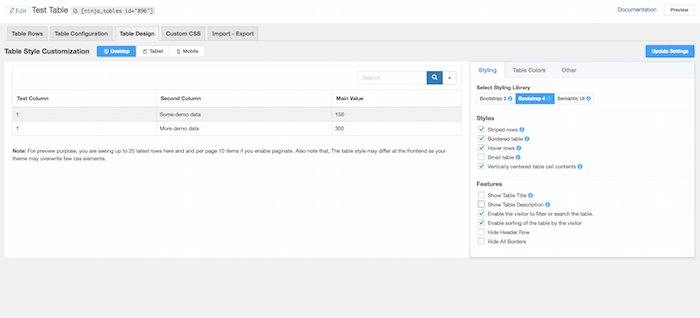
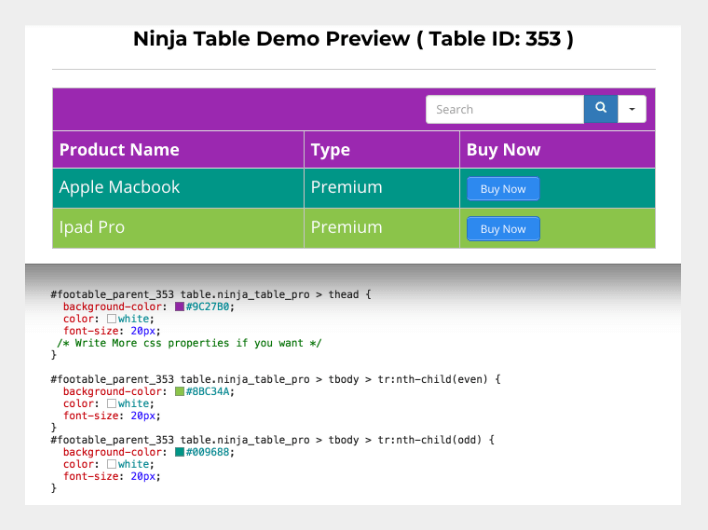
Styling Your Data Table
Next comes the presentation of your table which is the most important part of the process because how beautifully you have presented your data makes a big difference.
You have a number of different options to style your table. You can quickly choose if you wish to go for Bootstrap 3, Bootstrap 4, or the Semantic UI design.
As you can see there are a number of other options that work just with a click. You have the border or remove it, show or no show the table title and the description, and a number of other options.
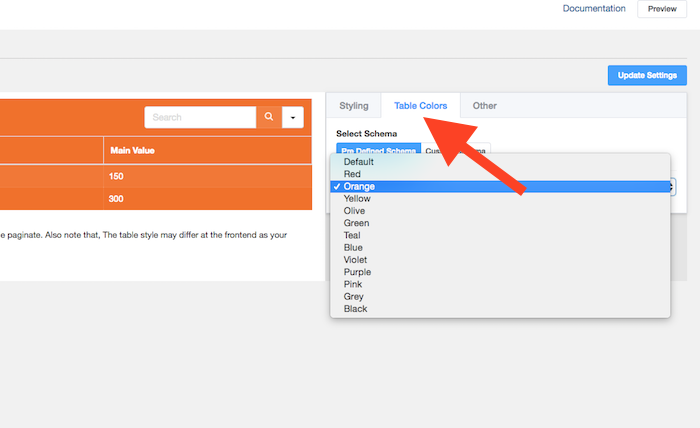
Once you finalize the overall look of your table you can go for the color options to make it more attractive.
You have all the prominent color options to choose from. Just select the one you like and move ahead.
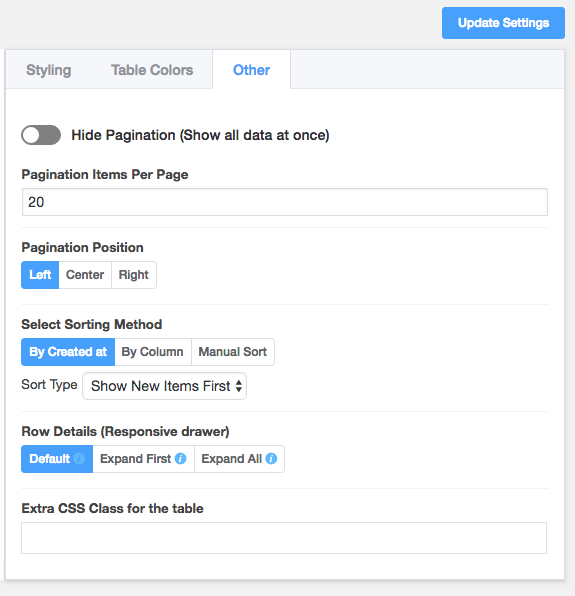
Other Settings
There are other important settings like the pagination, position, and data sorting options. You also have the option to add an extra class in the other settings tab.
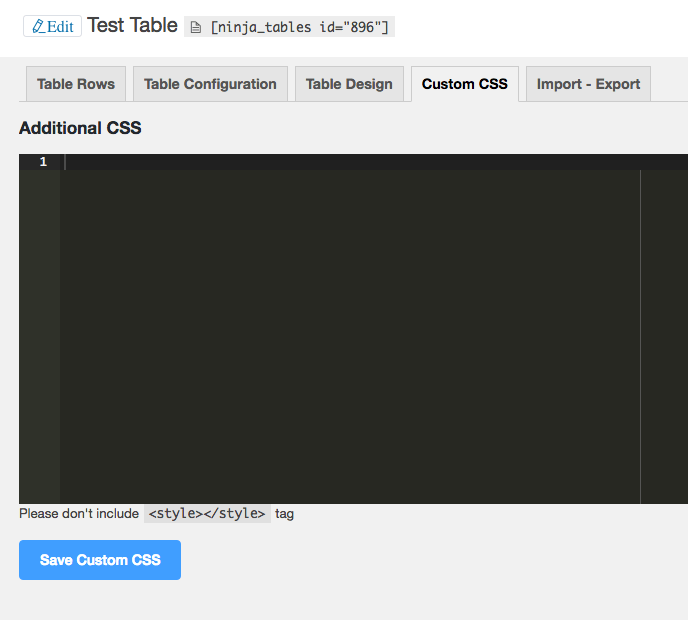
Add Custom CSS
The plugin gives you the option to add custom CSS to your table design to make it look even better. You can style the table to match the page where you are placing it.
If you are using the free version of the plugin, you will have the option to go for the pro-add-on for applying custom styling with the CSS module.
With this add-on, you will be able to apply styling to specific rows and columns of your table to make it look attractive and comprehensive.
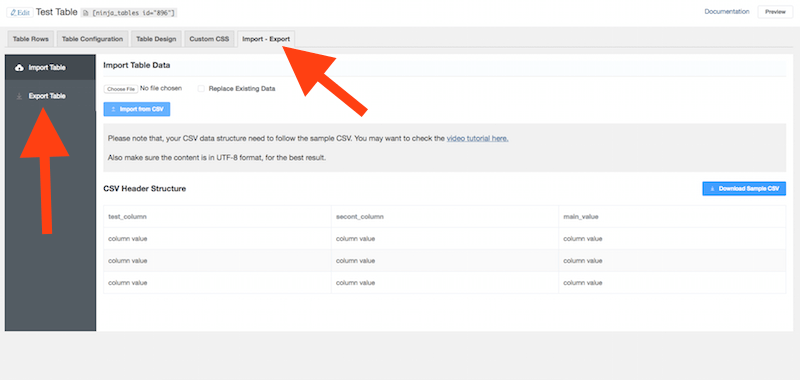
Data Import & Export
The Ninja Table plugin gives you a quick and simple option to import and export data. You have the option on the plugin settings page.
Go to the import & export tab in case you wish to import or export data to any of your tables.
You can import data in CSV format and replace the already available data on your table.
The export table data option is available in the left side menu under the import table option.
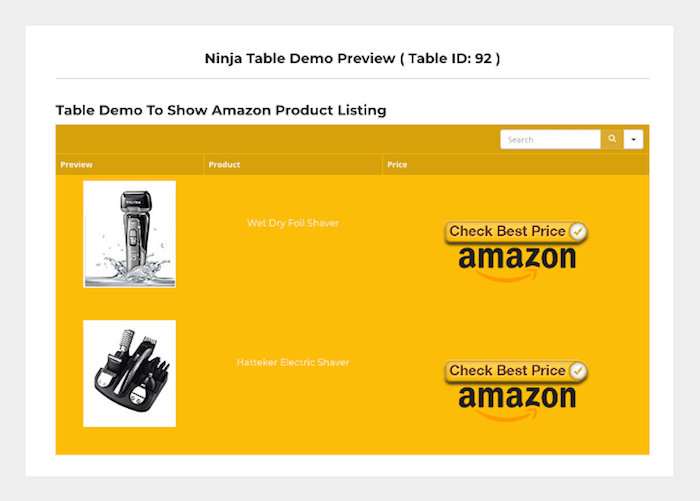
Showcase Amazon Products in a Table
If you are managing an Amazon affiliate site and wish to showcase different product bundles on your site. You can easily get that done using the Ninja Table plugin.
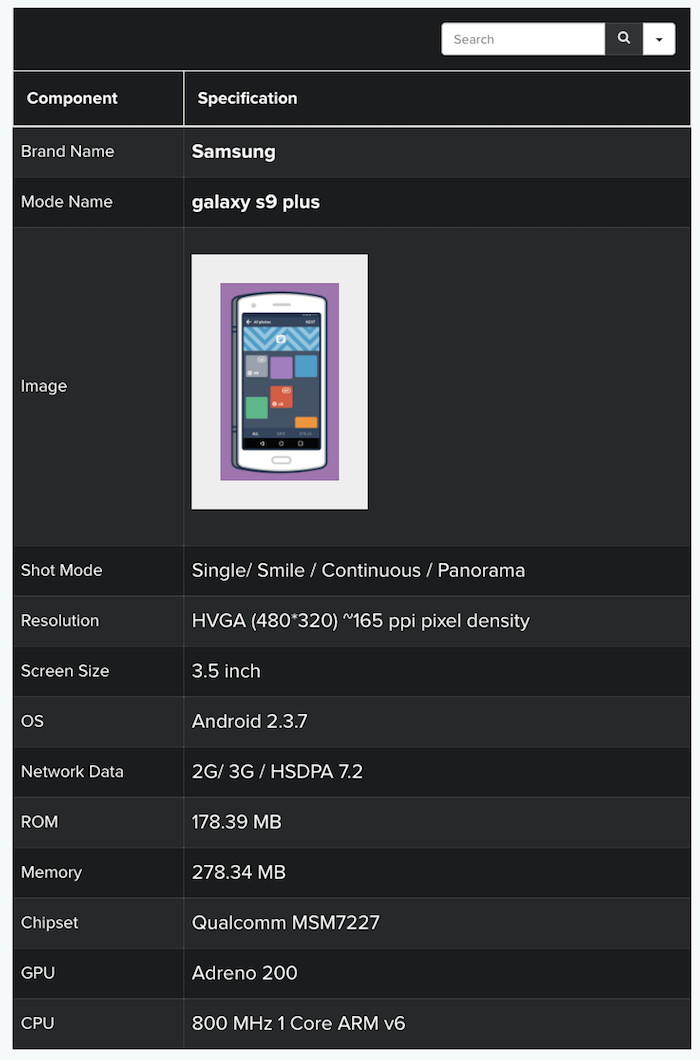
As already mentioned above, you have the option to put the HTML code in the table. So, you can easily add a product image, preview link, buy now button, and other details of the product on your site.
To make the overall presentation look better, you can color the table as per your requirements. You can make the table match the color scheme of your site.
You can also create a product-specific table on your site to showcase the product details.
Most of the frontline product-based websites use the table to specify the features of a product because it gives a nice experience to the users and helps them understand the features easily.
Add Product Image
You can add a product image on the data table to make it visually appealing, also it will make the table rich in design.
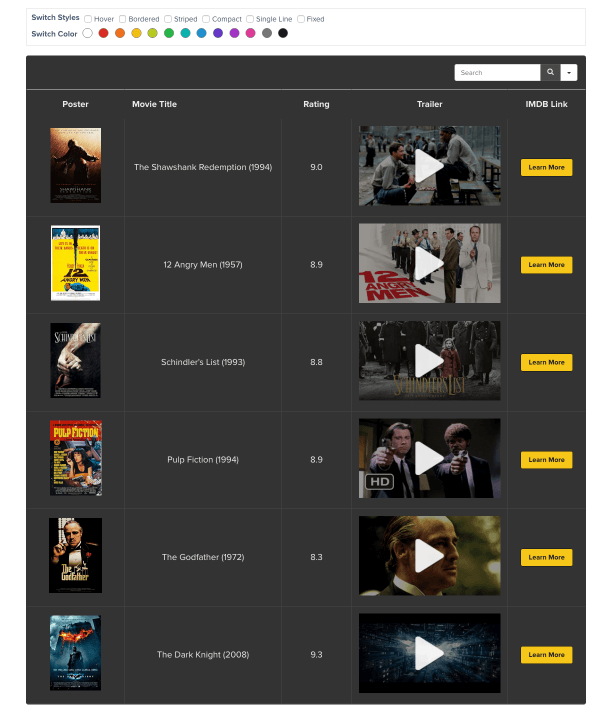
Add Video to Your Data Tables
You also have the option to embed external videos on your data table to make it even more comprehensive.
And I’m sure, this kind of data table with images and videos will have a great impact on the overall SEO of your site because it will improve the overall engagement on your site.
Integrate Google Sheet With Ninja Tables
Here is good news for all the professionals who use Google Sheets on a regular basis. Now, you can integrate your Google Sheet with the Ninja Tables.
All the changes that you make on the Google Sheet will be automatically on your Ninja Tables data.
Follow this video to learn more about it.
Final Word
Ninja Table is one of the top table plugins for WordPress without any doubt. It is comprehensive in terms of the features it offers.
You can do a lot more than just create a table with the Ninja Table Pro version. Other than simple data, you can create a product comparison site and showcase different products side by side to make it easier for your users to make an informed decision.
You can start with the free version of the plugin, check it thoroughly if it fulfills all your requirements, and then move to the pro version.
The asking price of the plugin is highly justified by looking at the features it offers you.
Get the Ninja Table Pro plugin today.
Show More
Show Less
What Kind of Support Ninja Table Offers?
Ninja Table comes with detailed documentation and support portal so that you can learn more about the product. You may also get in touch with the support team using support email or live chat.
Ninja Table is a legitimate WordPress table builder plugin, founded in 2017. It is designed to offer users a comprehensive and versatile tool for creating and customizing tables within the WordPress environment, backed by a dedicated team of 11-50 employees.
Ninja Table is worth paying for users who require advanced table and chart customization capabilities without coding in their WordPress sites. Its array of features and ease of use make it a valuable data table plugin for presenting complex data simply and effectively.
Ninja Table provides integrations with various software to enhance table functionalities, such as WooCommerce for e-commerce data management and Google Sheets for live data synchronization, effectively becoming the most versatile data table plugin. These integrations enable users to extend the utility and versatility of their tables within WordPress, illustrating the plugin’s position as a leading data table plugin in the WordPress ecosystem.
Ninja Table is designed to be highly accessible for users, offering a user-friendly interface that allows both beginners and experienced WordPress users to effectively create and customize tables without needing to know how to code.
Yes, Ninja Table comes with instructional materials and manuals to assist users in operating the software, ensuring it maintains its status as the best table plugin for support resources. These resources aim to help users maximize the plugin’s capabilities through detailed guides and tutorials.
Both beginners and experienced users can effectively use Ninja Table, a prime example of the best WordPress table plugin, thanks to its intuitive interface and extensive customization options. The plugin is designed to cater to the needs of a wide range of users, from those with no coding experience to professional developers, establishing it as the most user-friendly WordPress table plugin.
The necessary specifications for setting up Ninja Table on a system include having a WordPress installation, as Ninja Table is a premier WordPress table plugin. It requires WordPress 4.0 or higher, compatible with modern browsers, and sufficient server resources to handle the WordPress environment.
Platforms Supported
Windows: Not Supported
MacOS: Not Supported
Web-Based, Cloud: Supported
iPhone / iPad: Not Supported
Android: Not Supported
Review Method
At BeginDot, we go through each product in detail so that we can prove the most authentic information to our audience. We try the products, go through documentation, do research in user sentiments before adding our final recommendation.
We go through the software in detail
We test most of the software before writing
We go through documentation
We check communities for user sentiment
Affiliate Disclosure: BeginDot is reader-supported. When you buy through links on our site, we may earn an affiliate commission.
Did You Find ThisNinja Tables Pro review Helpful?
Don’t forget to write a review.
Join Software Buyers & Sellers
Get top software information and best deals right on your inbox.


 (1)")

 (1)")